Rover 200 & 400 Owners Club • Rover 416 GTI Auto - Restoring an old friend - Page 5
Page 5 of 14

Re: Rover 416 GTI Auto - Restoring an old friend

Posted: Fri Aug 27, 2021 11:58 am
by Plodder
I lived in a very hard water area in Hertfordshire
We got through 4 dishwashers in 20 years because of water scale issues and cleaned our shower head weekly because of the water scale build up
The hard water would have come from washing the car and the water used in the water bottle .Not sure whether the additives to car shampoo and windscreen cleaner help but after washing the car I’ve always had to polish the car to get rid of the white water marks. Down here in Devon the water is softer and rinsing with the car with water after washing leaving no marks at all.
Will have to get a sample of the stuff and add vinegar.
If it dissolves its likely to be scale otherwise it’ll probably be cavity wax as suggested

Re: Rover 416 GTI Auto - Restoring an old friend

Posted: Tue Aug 31, 2021 4:54 pm
by Plodder
crepello wrote: Thu Aug 26, 2021 9:11 pm
Are you sure that's not just factory-applied cavity wax? There's plenty of that in mine.
Crepello you were indeed right its just grotty cavity wax .
Applied a bit of white spirit, as per Waxoyl’s instructions for removing waxoyl overspray on paint , and the old wax came off really easily.
Just need to finish off cleaning the area and I’ll reapply some fresh making sure I block the air intakes to the heater matrix.
That’ll be another job done!

Re: Rover 416 GTI Auto - Restoring an old friend

Posted: Thu Sep 02, 2021 10:01 am
by Plodder
Just sorted out an agreed value classic car insurance.
Thankfully completely painless and hassle free.
Hardly any more than what I had been paying and now at least covers all the £££ spent on it last year .
Will also allow me to purchase a half decent replacement if the worst happened. :D

Re: Rover 416 GTI Auto - Restoring an old friend

Posted: Wed Sep 08, 2021 4:14 pm
by Plodder
Scuttle/Plenum gallery all cleaned up ready for rewaxing at some point.

Image Image

Black plastic plenum grill cleaned with tooth paste to remove 30 years of grim and started cleaning up in the engine bay.
Can’t believe how well its coming up.
Work in progress shot!

Image

Cleaned out the rear sunroof drains in my attempt to trace a water leak in the boot.
Found a reminder of its time in storage under a tree jammed in the bottom of the rubber tube outlet.

Image

Not sure if this was leading to the water backing up in the pipe and leaking at the joint between the rubber panel fitting and the rubber hose itself.
Had one Devon storm and no leaks but more rain due soon so fingers crossed

Brought a new boot lid seal as well. I’ll fit this once I work out the best way to glue the ends of the seal together. I normally end up with the ends misaligned when I try to stick this sorts of things together.

All put back together for the MOT today –passed with a couple of advisories which were more observations than issues. :thumbup

Re: Rover 416 GTI Auto - Restoring an old friend

Posted: Sat Oct 09, 2021 9:00 pm
by Plodder
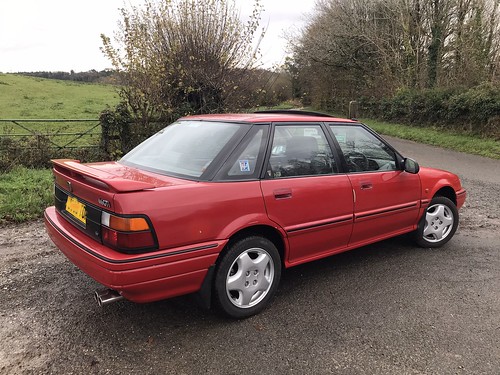
Finally hoping I have sorted the boot leak as it seemed to be coming from under the seal in different places depending on the direction of the wind but mainly under the rear boot edge.

Image

I’ve noticed that the groove of the boot seal , where it fits onto the metal lip , was always wet just above the bumper as if the water is finding its way under the seal higher up.
This may account for the rusty boot lip I had repaired last year.

Image

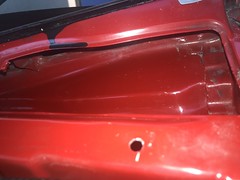
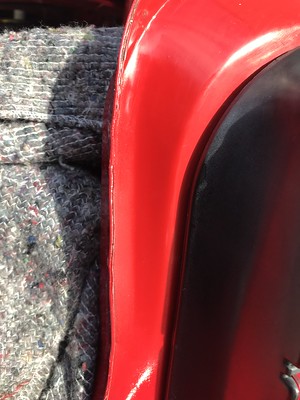
Fitted the new boot seal but noticed that the lip on the off-side was in very poor condition with a burr on the edge of the metal lip which had resulted in a build-up of paint and the metal lip was distorted on the vertical part of the lip.
Carefully straightened the lip to avoid any further damage, there is also a depressed area around a spot weld so a bit of sealant might be required to complete a really good seal.

Image Image

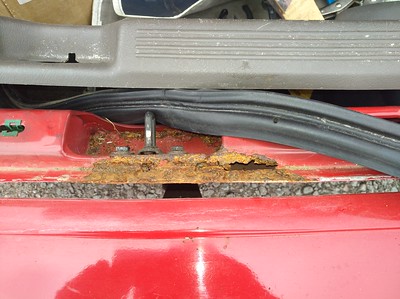
Uncovered a bit of corroded metal on the lip edge under the rear screen, not too serious , that will need repairing at some point but for now I’ll clean it up and paint it to stop the rust progressing.
I think that might be a tiny leak through the boot air vent so will have the bumper off at some point so I can reseal this. I’ve seen pictures of the air vents on the 5 door but not the 4 door.

Had a trip out to South West Rust Proofing in Westbury near Bath, just on the day when the petrol shortage kicked off, to complete an assessment on the state of the existing rust proofing – or lack of it. Booked in for next March and I’m sure there will be a few photos from that visit.
The guys there were very interested in the car/brand, as are a lot of garages I go to, and were complementary about its condition underneath the car which was reassuring .

Have also finished the top and bottom hose ugrade to silicon hoses.
Went smoothly except for cutting the 16mm hose from the bottom hose to the expansion tank too short.
I know measure twice cut once I hear you all cry, well I did, in fact I measured three times . The problem was I measured it to the wrong part of the nozzle on the expansion tank - I measured it to the end of the metal pipe that is inserted inside the plastic nozzle to give it strength.

Image

Fortunately the supplier had a replacement in stock and I didn’t have to wait another 8 weeks, but set me back more cost on an already expensive exercise.
The top hose is not as neat as I would like it to be. The offcuts from the 500mm straight section used for the bottom hose was too short meaning the connection to the expansion tank breather hose is too far forward. I should have brought the 1000mm straight section which would have given me a bigger length of offcut to use
Decided not to trim the 9.5mm dia expansion tank breather hose to length just yet until I come up with a better solution. So this hose is a bit messy at the moment.

Image Image

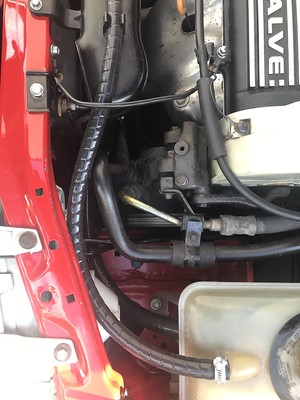
Might also upgrade the hose clips to bolt clamps or black hose clips at some point, far too many shiny hose clips and sharp edges for my liking, although there appears to be no leaks so far!
Turned out to be an expensive exercise at around £250 (excluding trial parts and messed up parts) for all the hoses and connectors but I think you could do the same changes but using normal rubber hoses for under half the price which perhaps would have been more sensible.
However I’m pleased with the results and look forward to the hoses withstanding the rigors of the journeys up the M5 to the shows next year and beyond .


Thanks for looking

Re: Rover 416 GTI Auto - Restoring an old friend

Posted: Sat Oct 09, 2021 10:07 pm
by Paul_1978_yorks
Enjoying the thread, cheers!

Re: Rover 416 GTI Auto - Restoring an old friend

Posted: Thu Oct 14, 2021 10:55 am
by Plodder
Well there’s good news and bad news.

The good news is that Merlin Motorsport have organised a special order for a 28mm i/d ninety degree hose with an extended elbow length of 150mm instead of 102mm for just a few pounds more.
This will mean a much better and tidier solution to the top hose.

Bad news its a 12 week lead time.
More bad news….the radiator seems to have sprung a leak so out it will have to come and off to pressure test and repair.

Still could have been worse , I could have been on the M5 when it decided to fail🤣

Re: Rover 416 GTI Auto - Restoring an old friend

Posted: Fri Dec 03, 2021 2:03 pm
by Plodder
Few photos from a celebratory drive as "Jese" celebrates her calculated "off the production line" 30th birthday today

Image

Image

Image

Image

Progress is still sporadic but generally going in the right direction - guess that's why they call it a "rolling resto" :laughing2 - but still manages a spirited drive down the A38

Re: Rover 416 GTI Auto - Restoring an old friend

Posted: Fri Dec 03, 2021 4:20 pm
by itcaptainslow
Looks great!

Re: Rover 416 GTI Auto - Restoring an old friend

Posted: Fri Dec 03, 2021 4:59 pm
by Topcat Tomcat
Nice, but it's wet! 😲