
Great read
I love Devon
Used to holiday there as a kid
Rover 416 GTI Auto - Restoring an old friend
Re: Rover 416 GTI Auto - Restoring an old friend
1993 Rover 220 GSi Turbo , 2005 MG ZS 180 mk2
Re: Rover 416 GTI Auto - Restoring an old friend
Like ik my Rover in its life never went west of Bristol it went to as far north as Loch Ness and the south France
Rover 214si 1990

Re: Rover 416 GTI Auto - Restoring an old friend
Just a brief update on where I am since earlier in the year.
Still not in permanent accommodation so a lot of the jobs difficult to complete.
New distributor cap and rotor arm fitted. Start-up massively improved so the car now realising it’s a 4 cylinder car rather than just 3 cylinder on start up.
Stripped the offside wing mirror apart but still didn’t managed to get any more adjustment out of it .
On max adjustment it only just gives me an acceptable rear view. Wondering if this replacement mirror was actually for a left hand drive car.


Decided to change the automatic transmission fluid after 40K miles (but realised it was actually 20 years old). Whilst there doesn’t seem to be anything wrong with the gearbox, apart from a sluggish clutch sometimes when it hasn’t been taken for a regular run, I decided to get an oil lab check on the transmission oil just to see what state it was in – big mistake!
Picture below shows the sample sent which should be red
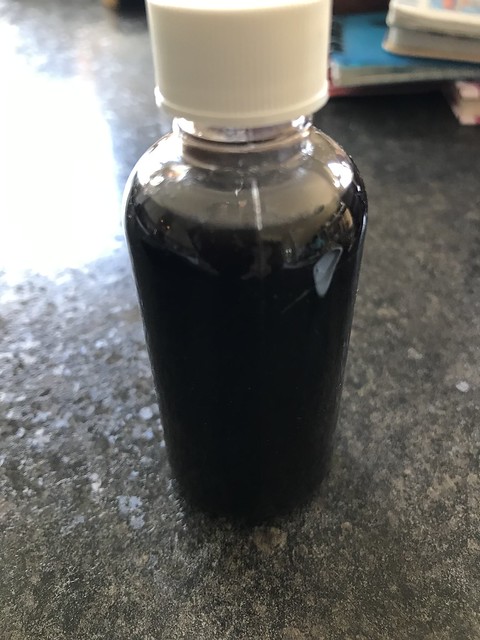
Came back saying that immediate action required, high levels of iron and aluminum, due to possible bearing or gear breakdown. After some on-line research I’ve decided not to worry too much. The main reason was I had no base line and it’s the rate of change in contaminates that’s crucial. I’ve recently changed the radiator and steel transmission oil cooler pipes, all of which had been lying around for many years and were probably highly contaminated. So I’ve decided the best course of action is to flush the system, get it tested to give me a base-line and then get a follow test in a year’s time - then see then if I need to worry.
More importantly I’ve improved my service records to ensure future maintenance is done on time.
Other work so far includes the relacquering of the fascia strip. Despite my best efforts and countless attempts following the rattle can instructions of no more than 3 coats I failed to get a decent gloss finish. Alternative methods on the internet suggest between 8 to 16 coats without any rubbing down between successive layers. I sprayed 8 layers and this seems to have worked to bit better and I’ve now got a half decent finish. But after a year of playing with it I have decided to cut my loses, refit and move on. Definitely a case of it didn’t do what it said on the can (instructions that is )

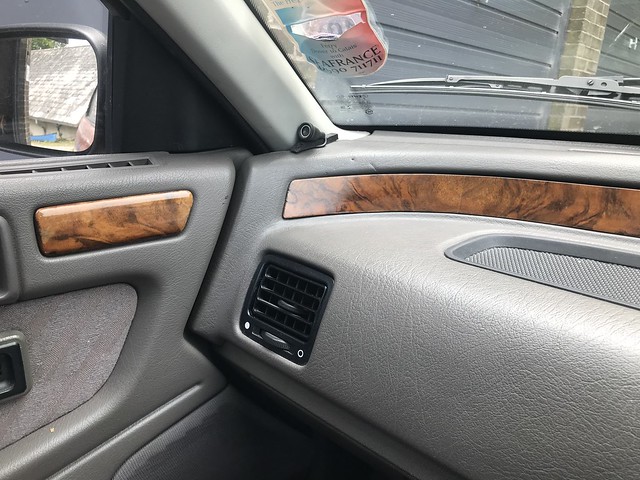
Varnishing may have been a better method as it would have filled the surface texture of the veneer.
This might have given me a more comparable finish to the original wood finishers.
I have also put a bit of gaffer tape around the left hand end clip to aid removal.
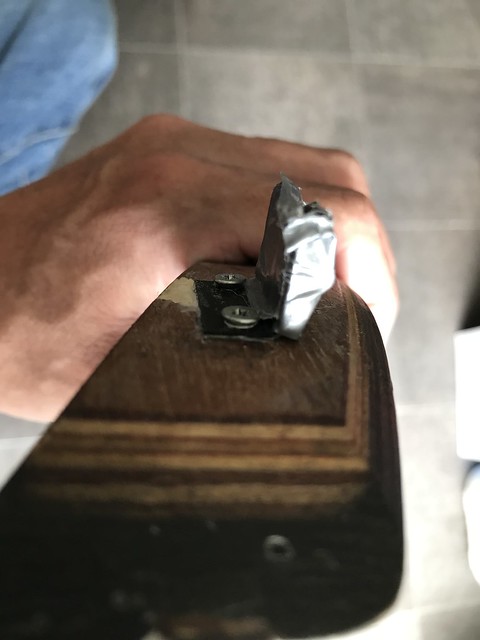
This is because I always rip this clip off the back of the fascia strip when removing it. The gaffer tape eases the clip through the metal panel aperture. Electrical sleeving would have probably looked and worked better but I didn’t have any that size.
Still waiting for delivery of silicon hose parts for the top and bottom hose, another story to follow, hoped to get these fitted this month but it hasn’t happened so I’ve had to cancel my 400 mile round trip to Gaydon on July 11th.
Thanks for looking
Still not in permanent accommodation so a lot of the jobs difficult to complete.
New distributor cap and rotor arm fitted. Start-up massively improved so the car now realising it’s a 4 cylinder car rather than just 3 cylinder on start up.
Stripped the offside wing mirror apart but still didn’t managed to get any more adjustment out of it .
On max adjustment it only just gives me an acceptable rear view. Wondering if this replacement mirror was actually for a left hand drive car.
Decided to change the automatic transmission fluid after 40K miles (but realised it was actually 20 years old). Whilst there doesn’t seem to be anything wrong with the gearbox, apart from a sluggish clutch sometimes when it hasn’t been taken for a regular run, I decided to get an oil lab check on the transmission oil just to see what state it was in – big mistake!
Picture below shows the sample sent which should be red
Came back saying that immediate action required, high levels of iron and aluminum, due to possible bearing or gear breakdown. After some on-line research I’ve decided not to worry too much. The main reason was I had no base line and it’s the rate of change in contaminates that’s crucial. I’ve recently changed the radiator and steel transmission oil cooler pipes, all of which had been lying around for many years and were probably highly contaminated. So I’ve decided the best course of action is to flush the system, get it tested to give me a base-line and then get a follow test in a year’s time - then see then if I need to worry.
More importantly I’ve improved my service records to ensure future maintenance is done on time.
Other work so far includes the relacquering of the fascia strip. Despite my best efforts and countless attempts following the rattle can instructions of no more than 3 coats I failed to get a decent gloss finish. Alternative methods on the internet suggest between 8 to 16 coats without any rubbing down between successive layers. I sprayed 8 layers and this seems to have worked to bit better and I’ve now got a half decent finish. But after a year of playing with it I have decided to cut my loses, refit and move on. Definitely a case of it didn’t do what it said on the can (instructions that is )
Varnishing may have been a better method as it would have filled the surface texture of the veneer.
This might have given me a more comparable finish to the original wood finishers.
I have also put a bit of gaffer tape around the left hand end clip to aid removal.
This is because I always rip this clip off the back of the fascia strip when removing it. The gaffer tape eases the clip through the metal panel aperture. Electrical sleeving would have probably looked and worked better but I didn’t have any that size.
Still waiting for delivery of silicon hose parts for the top and bottom hose, another story to follow, hoped to get these fitted this month but it hasn’t happened so I’ve had to cancel my 400 mile round trip to Gaydon on July 11th.
Thanks for looking
1991 Rover 416 GTi Auto - Flame Red - Owned since Aug 97 
Re: Rover 416 GTI Auto - Restoring an old friend
Well they finally arrived after 8 weeks on order! 
All the silicon hose parts needed to replace the top and bottom hoses

Straight hose id 28mm (500mm long), Flexible Hoses id 28mm, id 16.5mm, id 9.5mm (each 1000mm long), Right Angle Hose, Right Angle Joiner, hose clips.
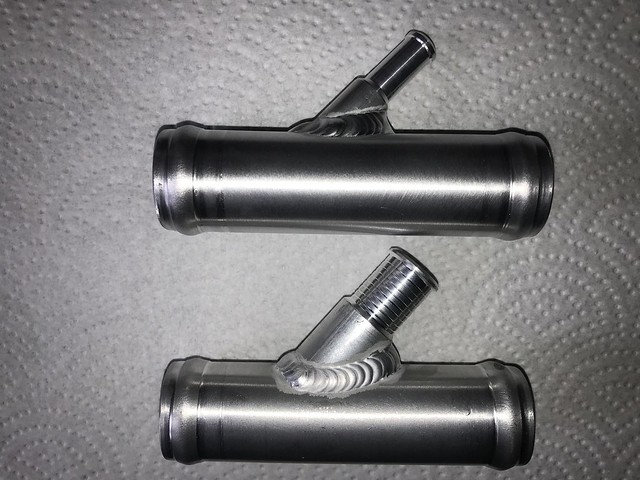
Two off 28mm aluminum joiners with takes off for expansion tank feed (id 16.5mm) and breather (id 9.5mm).
All the silicon hose parts needed to replace the top and bottom hoses
Straight hose id 28mm (500mm long), Flexible Hoses id 28mm, id 16.5mm, id 9.5mm (each 1000mm long), Right Angle Hose, Right Angle Joiner, hose clips.
Two off 28mm aluminum joiners with takes off for expansion tank feed (id 16.5mm) and breather (id 9.5mm).
1991 Rover 416 GTi Auto - Flame Red - Owned since Aug 97
Re: Rover 416 GTI Auto - Restoring an old friend
Loving the thread!
Great work so far.
Great work so far.
Rover 220 Coupe Turbo
Rover 220 Coupe Turbo Racer
Rover 220 Coupe Turbo Racer
Re: Rover 416 GTI Auto - Restoring an old friend
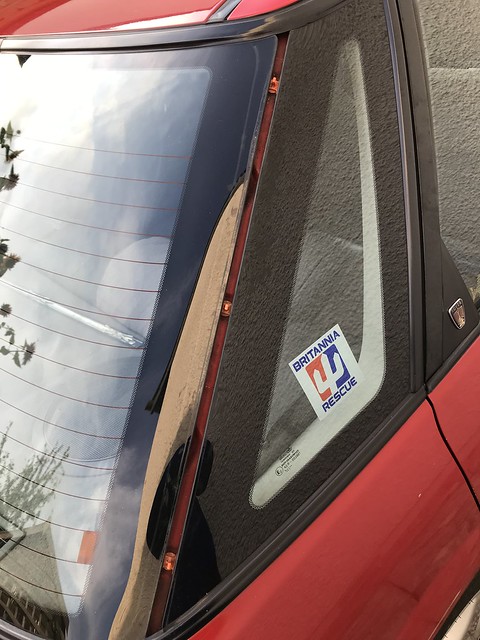
A temporary distraction whilst I was cutting and fitting the new top and bottom hoses, and sorting out a main relay issue, was the finisher between the sixth light (rear fixed glass pane) and the rear screen.
At some point I had caught the finisher at the bottom whilst cleaning the car and bent it slightly. This made it increasingly prone to being caught during cleaning and more damage resulted.

Tried straightening the finisher in situ, but to no avail.
Looking at pictures of the clips involved on the Rimmer Bros website and having had experience of the clips on the bottom finisher on the rear screen I decided the best way of removing it was by sliding the finisher upwards leaving the clips in situ to be removed later. This didn’t work ,as I would later discover the edge of the finisher had been damaged. If I did it again I would have removed the top finisher from the rear screen as well.
I eventually unclipped two of the X shaped clips from behind the glass but this left 3 clips that seemed more secure. These broke as I pulled the finisher away from the glass to look underneath it.

With the finisher removed it was clear that these three clips were attached to another plastic pin fitting in the rear pillar

With the finisher removed the white X-clips can be detached from the orange pins easily by opening the tabs on the white X-clips with a tiny screwdriver.
The 3 orange pin fittings include seals to the bodywork (Similar to the fittings on the A-Pillar) .
These looked in good condition but I poured some water over them for good measure and no water found its way into the boot.
Straightening the old finisher was easy once removed , although after refitting I felt it might have been advantageous to tweak the ends a bit more so they were more secure against the glass.
The Rimmer diagram is also confusing as the diagram shows 2 X shaped clips DYC10034 and DCY10035, one was 94p and the other was £3. A search on the internet showed DCY10034 being the clips needed so I brought a few of those as extra just in case. The Rimmer Bros diagram also says you only need 2 clips but there are 5 fitted to mine.

I also bought a new finisher as the soft edges of the old one had broken off and will save this for the future respray.
Refitting was easier as all the clips just pushed through to clip onto the pins or just behind the screen.
Finished job is now much tidier and hopefully will not be further damaged during washing.

Back now to the hoses, main relay and boot water leak.
Hold on what about cleaning of the hard water scale in the scuttle /plenum chamber .
At some point I had caught the finisher at the bottom whilst cleaning the car and bent it slightly. This made it increasingly prone to being caught during cleaning and more damage resulted.
Tried straightening the finisher in situ, but to no avail.
Looking at pictures of the clips involved on the Rimmer Bros website and having had experience of the clips on the bottom finisher on the rear screen I decided the best way of removing it was by sliding the finisher upwards leaving the clips in situ to be removed later. This didn’t work ,as I would later discover the edge of the finisher had been damaged. If I did it again I would have removed the top finisher from the rear screen as well.
I eventually unclipped two of the X shaped clips from behind the glass but this left 3 clips that seemed more secure. These broke as I pulled the finisher away from the glass to look underneath it.
With the finisher removed it was clear that these three clips were attached to another plastic pin fitting in the rear pillar
With the finisher removed the white X-clips can be detached from the orange pins easily by opening the tabs on the white X-clips with a tiny screwdriver.
The 3 orange pin fittings include seals to the bodywork (Similar to the fittings on the A-Pillar) .
These looked in good condition but I poured some water over them for good measure and no water found its way into the boot.
Straightening the old finisher was easy once removed , although after refitting I felt it might have been advantageous to tweak the ends a bit more so they were more secure against the glass.
The Rimmer diagram is also confusing as the diagram shows 2 X shaped clips DYC10034 and DCY10035, one was 94p and the other was £3. A search on the internet showed DCY10034 being the clips needed so I brought a few of those as extra just in case. The Rimmer Bros diagram also says you only need 2 clips but there are 5 fitted to mine.
I also bought a new finisher as the soft edges of the old one had broken off and will save this for the future respray.
Refitting was easier as all the clips just pushed through to clip onto the pins or just behind the screen.
Finished job is now much tidier and hopefully will not be further damaged during washing.
Back now to the hoses, main relay and boot water leak.
Hold on what about cleaning of the hard water scale in the scuttle /plenum chamber .
1991 Rover 416 GTi Auto - Flame Red - Owned since Aug 97
Re: Rover 416 GTI Auto - Restoring an old friend
I’ve re-edited these post this morning as I had an emergency call last night from family so the original post was a bit short and sweet.
Could be cavity wax , not thought of that just assumed it was the affect of hard water and the heat from the engine causing loads of unsightly scale.
Looled a real mess in there when I looked .
Also seems to be sprayed pretty indiscriminately.
Might need to recoat it with some fresh stuff now that I’ve started cleaning it off although some areas are difficult to get to.
Anyone got any recommendations of products I could use here.
I am booked in to get the rest of the rustproofing checked and assessed but whilst I’m already working on this area with the grill and wipers off it wouldn’t take much just to recoat the area with some fresh wax once clean up is finished
1991 Rover 416 GTi Auto - Flame Red - Owned since Aug 97
Re: Rover 416 GTI Auto - Restoring an old friend
Here's a couple of pictures of the build up of hard water or cavity wax in the scuttle area on my car


1991 Rover 416 GTi Auto - Flame Red - Owned since Aug 97
Re: Rover 416 GTI Auto - Restoring an old friend
The question is - Where would all that hard water come from?
'Hard Rain' after all is some of the softest water available.
'Hard Rain' after all is some of the softest water available.


